The Covid-19 Lockdown Pushed Me To Make My Own Wedding Outfit And Here’s The Result
My partner and I were supposed to get married in May 2020. Unfortunately, we had to postpone due to the Covid-19 pandemic. We re-scheduled for October 2021. This extra time I used to make my outfit completely by hand and use every skill I learned over the years in order to make it extra-special.
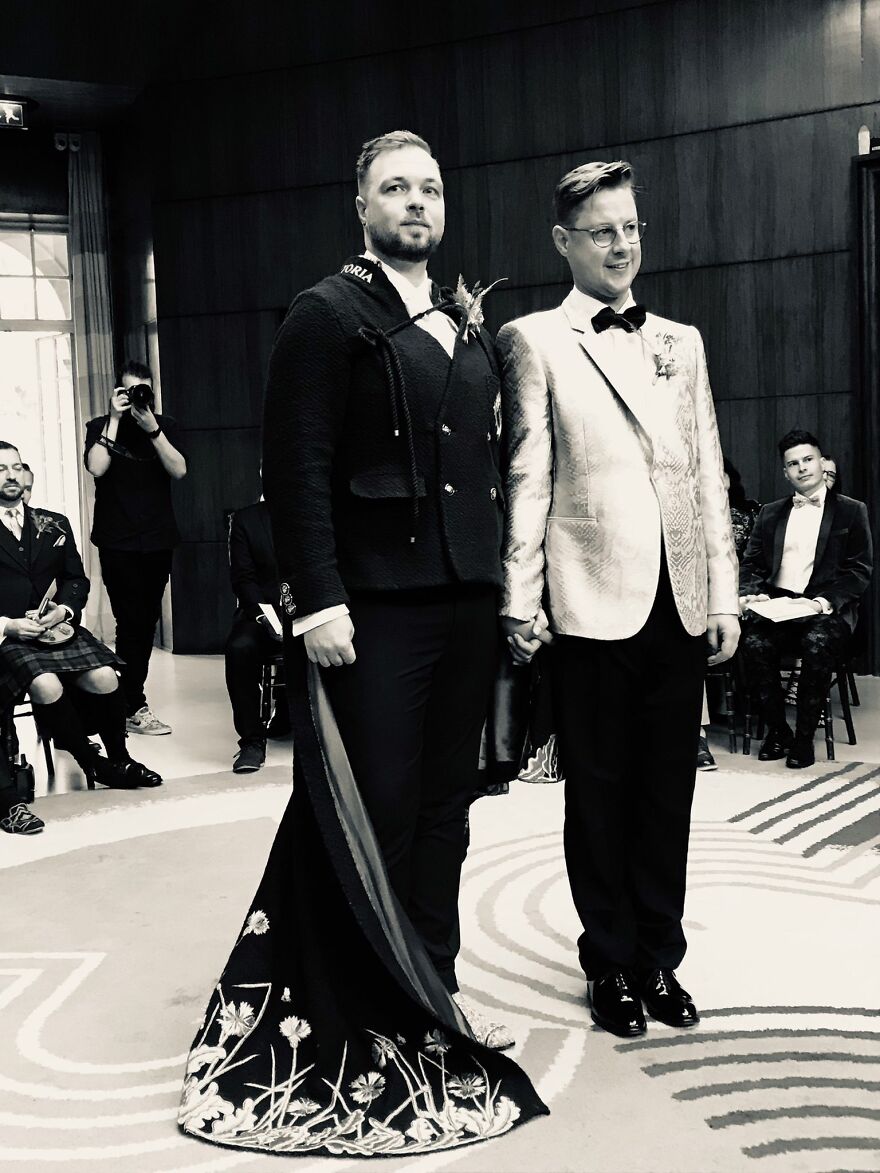
My partner and I got married after 18 months of delay due to the Covid-19 pandemic
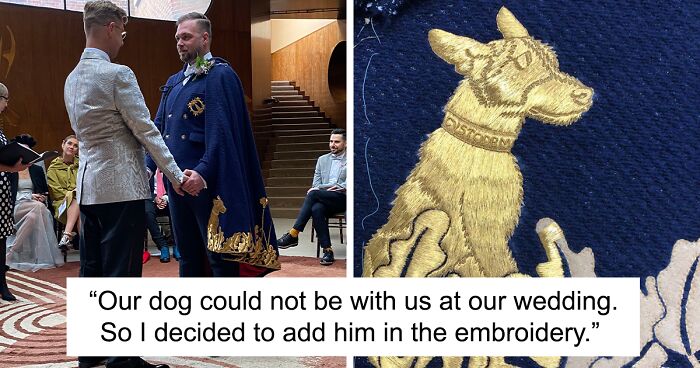
My partner (left) and I (right) finally got married after 18 months of delay due to the Covid-19 pandemic. During lockdown, I started making my own outfit because I am extra like that—and I wanted to show off all the skills that I learned over the years.
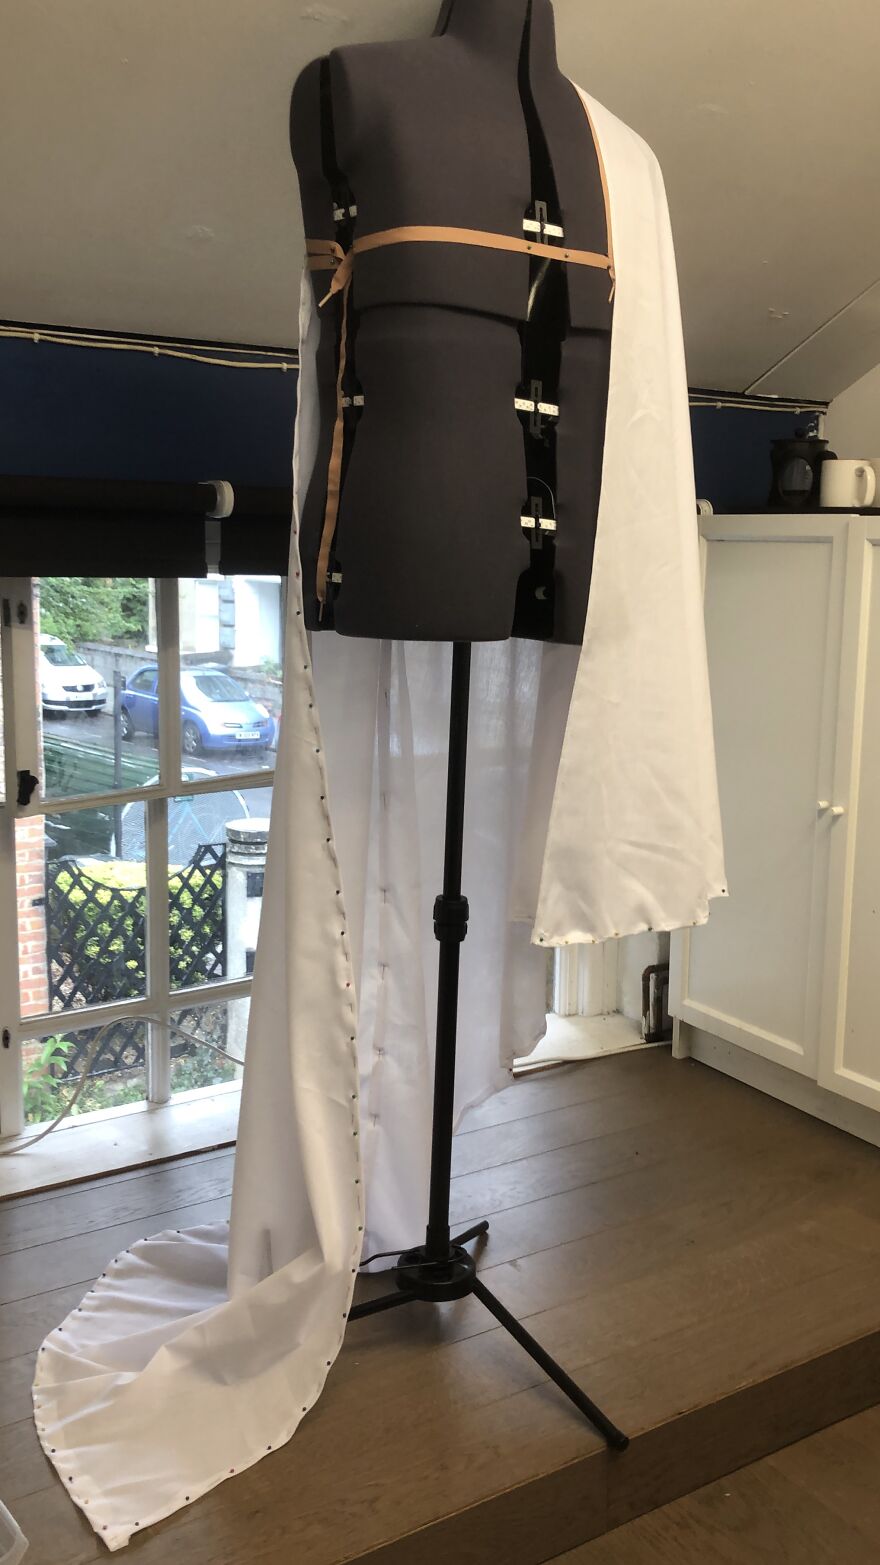
For my wedding outfit, I wanted an asymmetrical cape that only goes over one shoulder for more drama
The cape was the easiest pattern—literally 3 large pieces of fabric. I needed to make the pattern for it first, since I planned to have goldwork embroidery made directly on the fabric. For that, I needed to map out the pieces exactly. I wanted an asymmetrical cape that only goes over one shoulder for more drama.
Drawing out the embroidery designs to honour my partner and my heritage
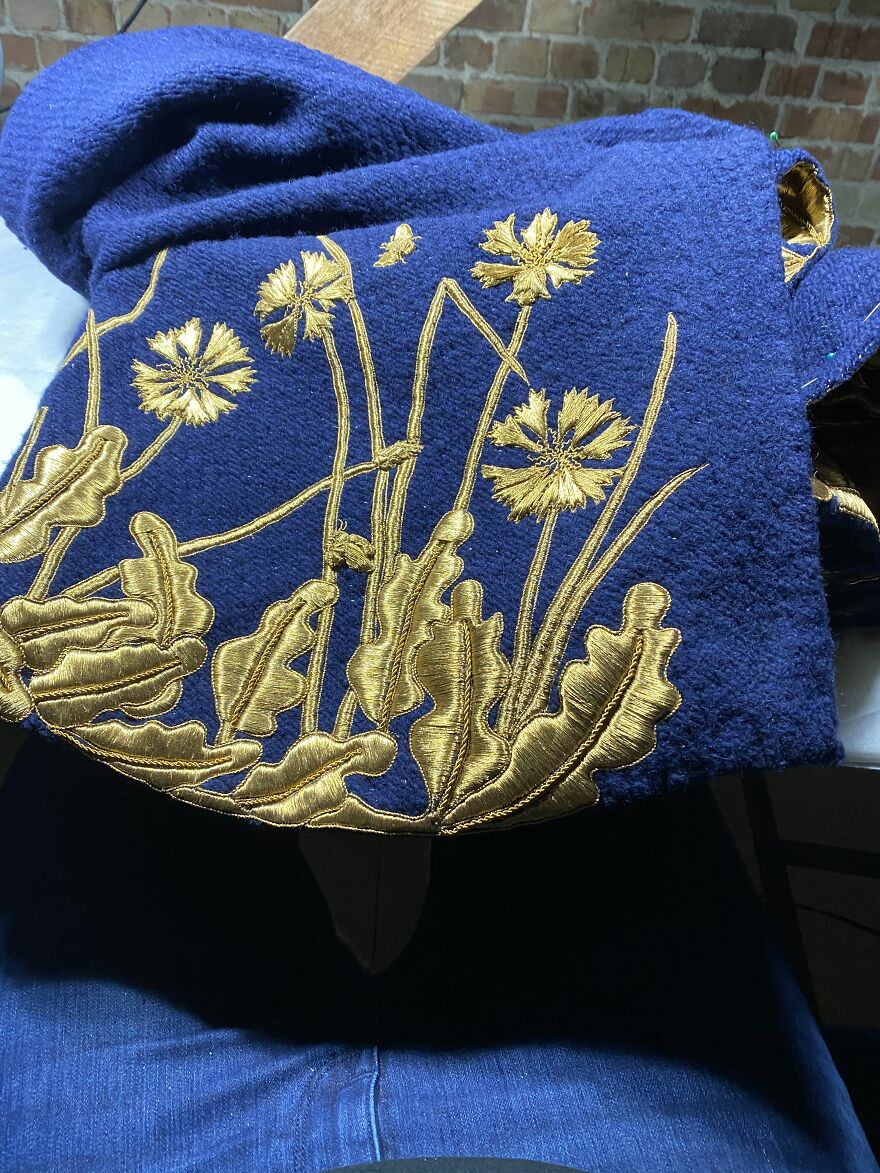
I wanted to honour my partner and my heritage with the embroidery. The design is oak leaves (English for my partner) and cornflowers (German for me). I really like bees, so I added them everywhere, buzzing around the flowers.
When the designs were ready, it was time for the embroidery
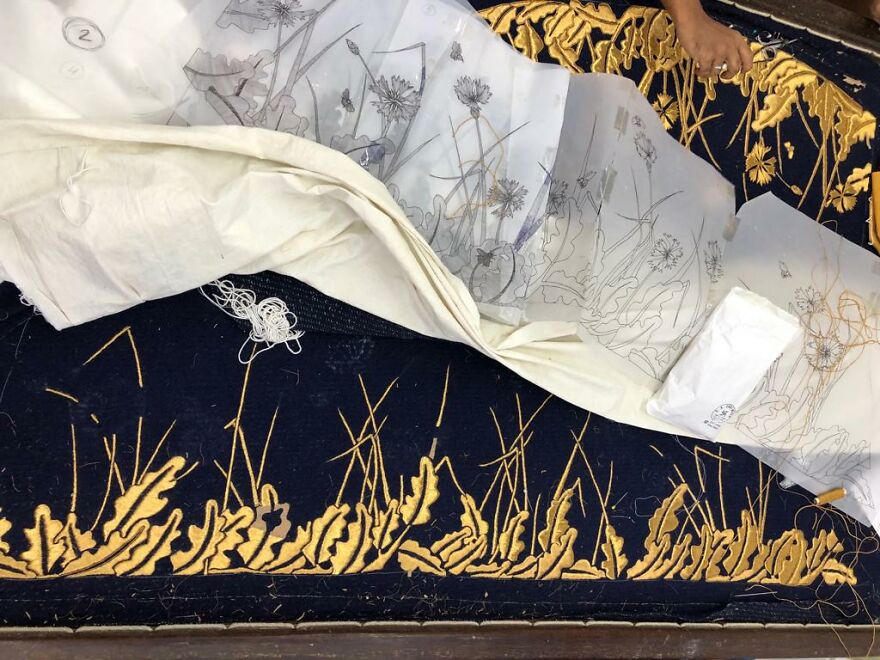
With all the designs drawn and the fabric marked and cut, it is time to go to India in order to get embroidered.
The embroidery was done by hand in traditional techniques
The embroidery took over 2 months to make! It was all done by hand in traditional goldwork embroidery techniques.
I added some sentimental details into the embroidery
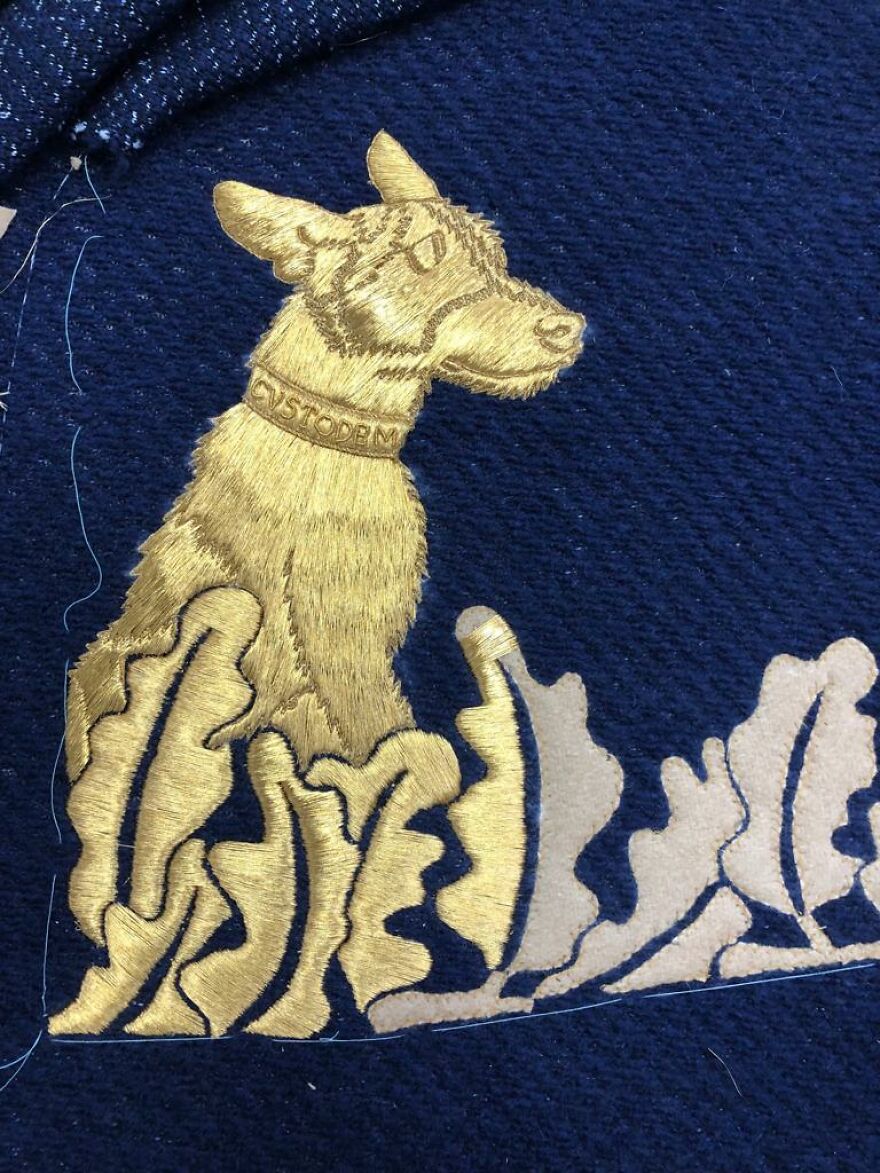
Our dog could not be with us at our wedding since the venue did not allow pets. So I decided to add him in the embroidery. This way he could be there in spirit. His collar says “Custodem”—which means “I am the watcher” since he prides himself as a guard dog.
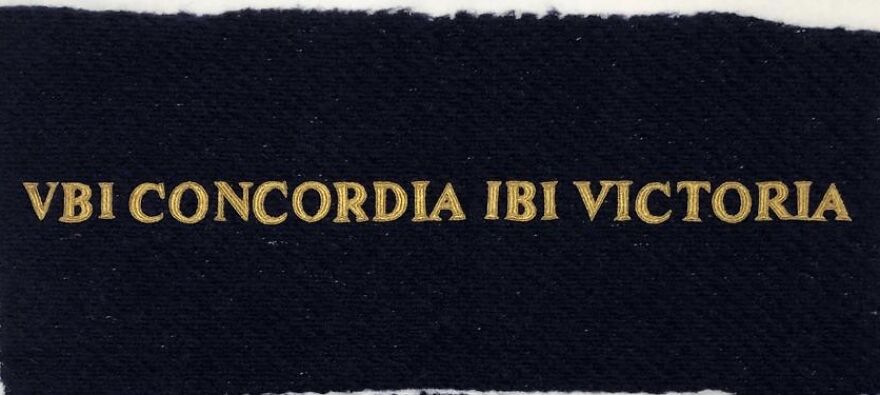
To make the outfit a little bit more extra, I embroidered the motto of our wedding in Latin language
“Ubi Concordia Ibi Victoria” was the unofficial motto of our wedding. It means: “Where there is unity, there is victory.”
I had to stitch the pieces together by hand to avoid damaging the embroidery
Since the embroidery is touching each other on the seam, I had to stitch the pieces together by hand. A sewing machine would not be able to get this close to the embroidery without damaging it.
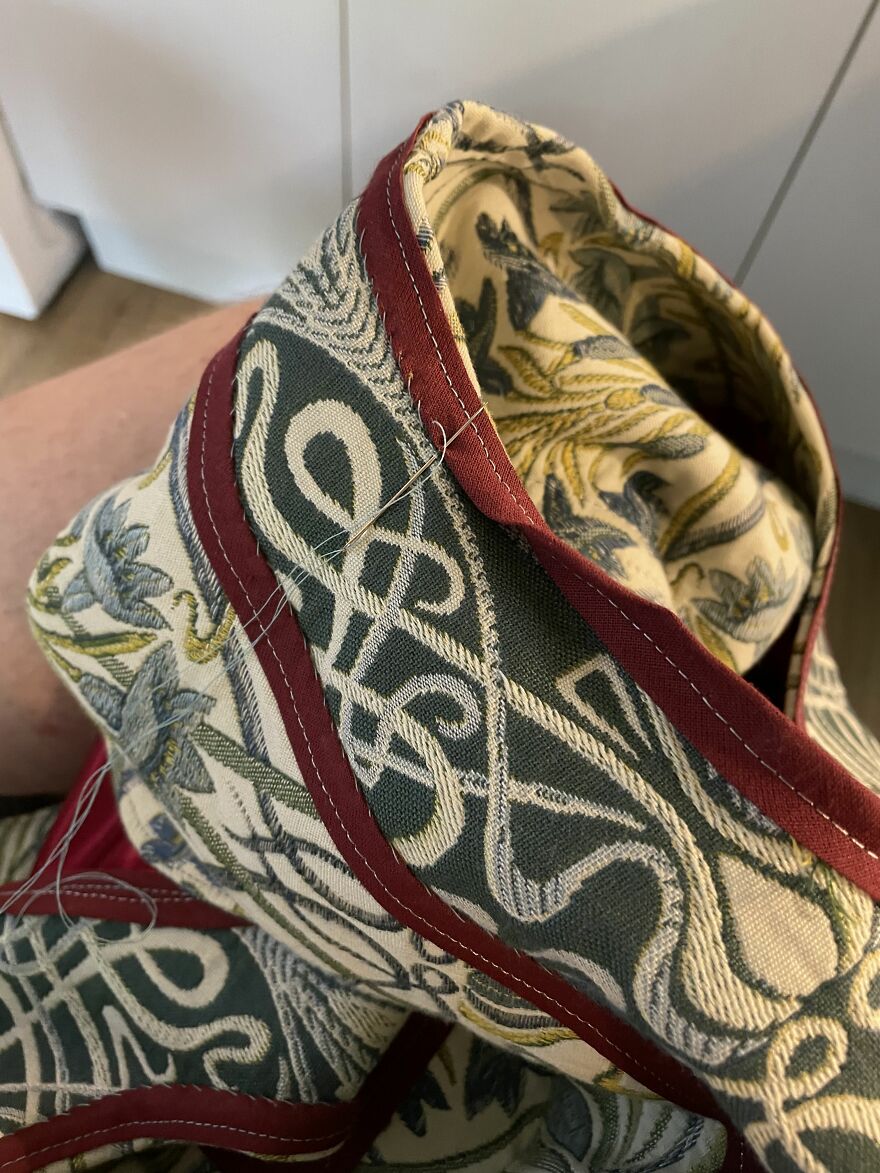
The cape had a lot of tiny “invisible stitches”
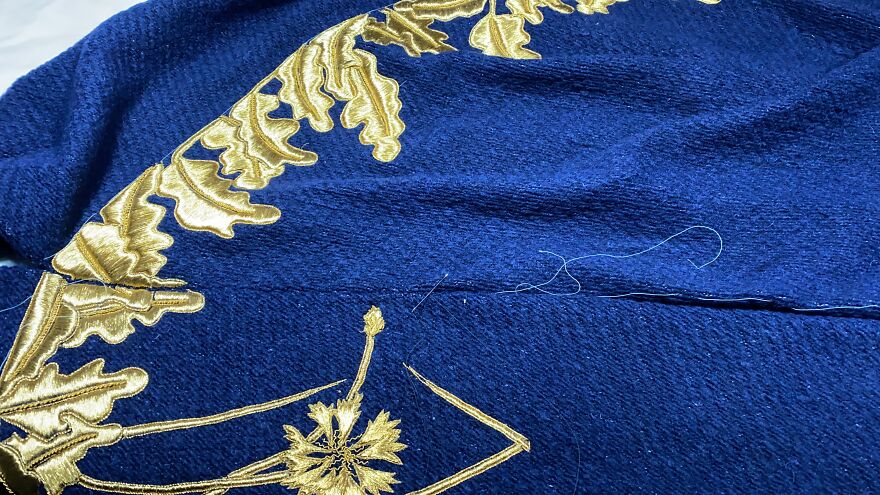
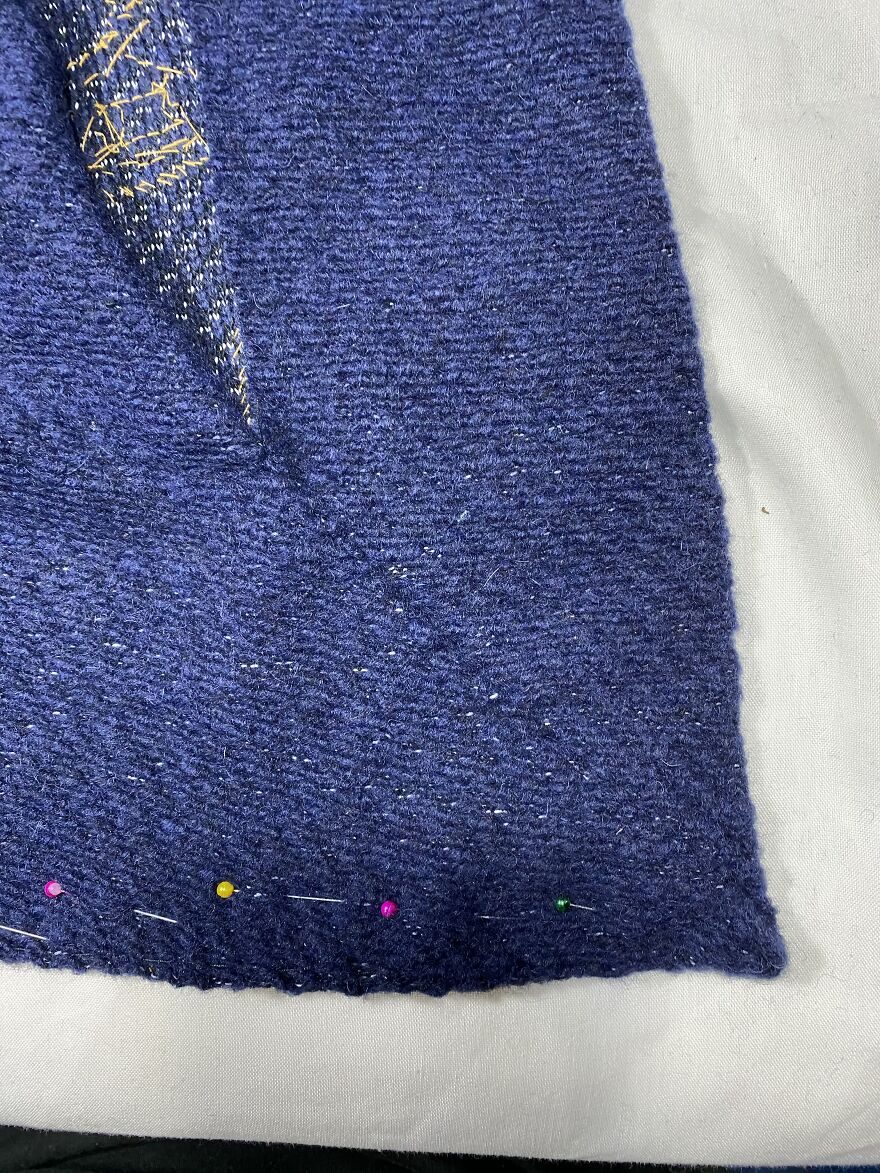
In order for the cape to hold its shape, I needed to fold its ends inside and stitch it to the outside with ‘invisible’ tiny stitches that only penetrate the top pile of the fabric without going through it completely.
Invisible stitches make a seamless border
I had to line the cape, so I chose a dark red color for even more drama
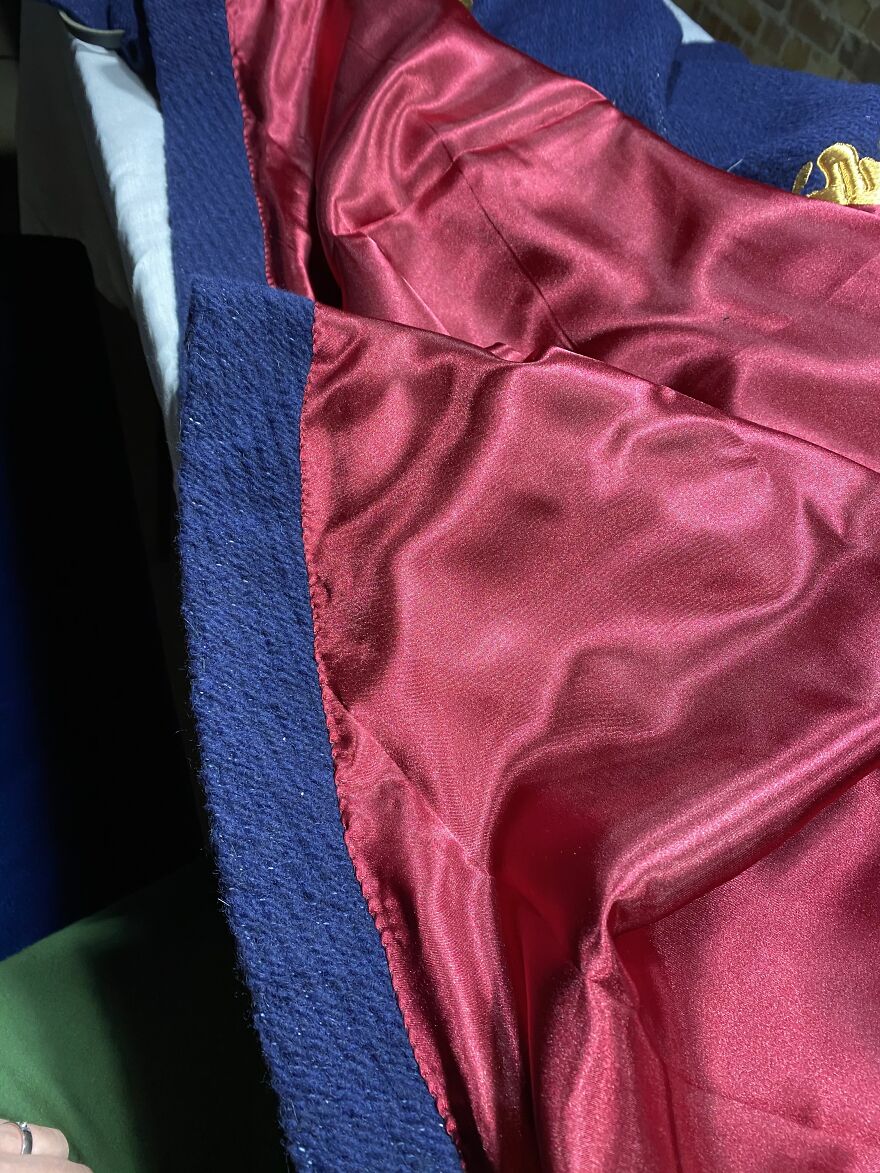
Now, the cape needed to be lined since the inside would be visible while wearing. I chose dark red for added drama. The lining was also sewn in by hand by me in order to not have any visible stitches on the outside.
I kept my outfit in our attic to prevent my fiancé from seeing it
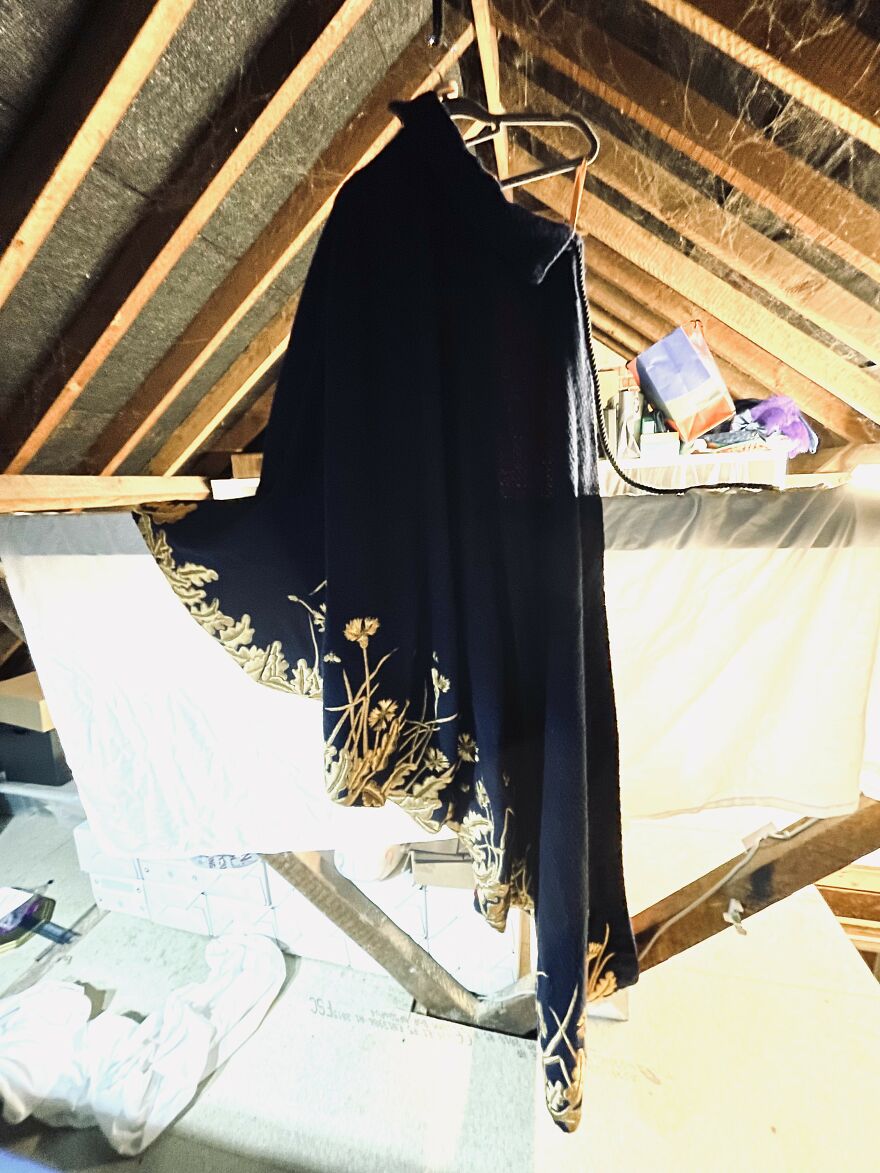
Apologies for the bad lighting. In order to keep my outfit secret from my fiancé, I went to our attic to sew. Its a bit dark up there.
I had to make a waistcoat myself
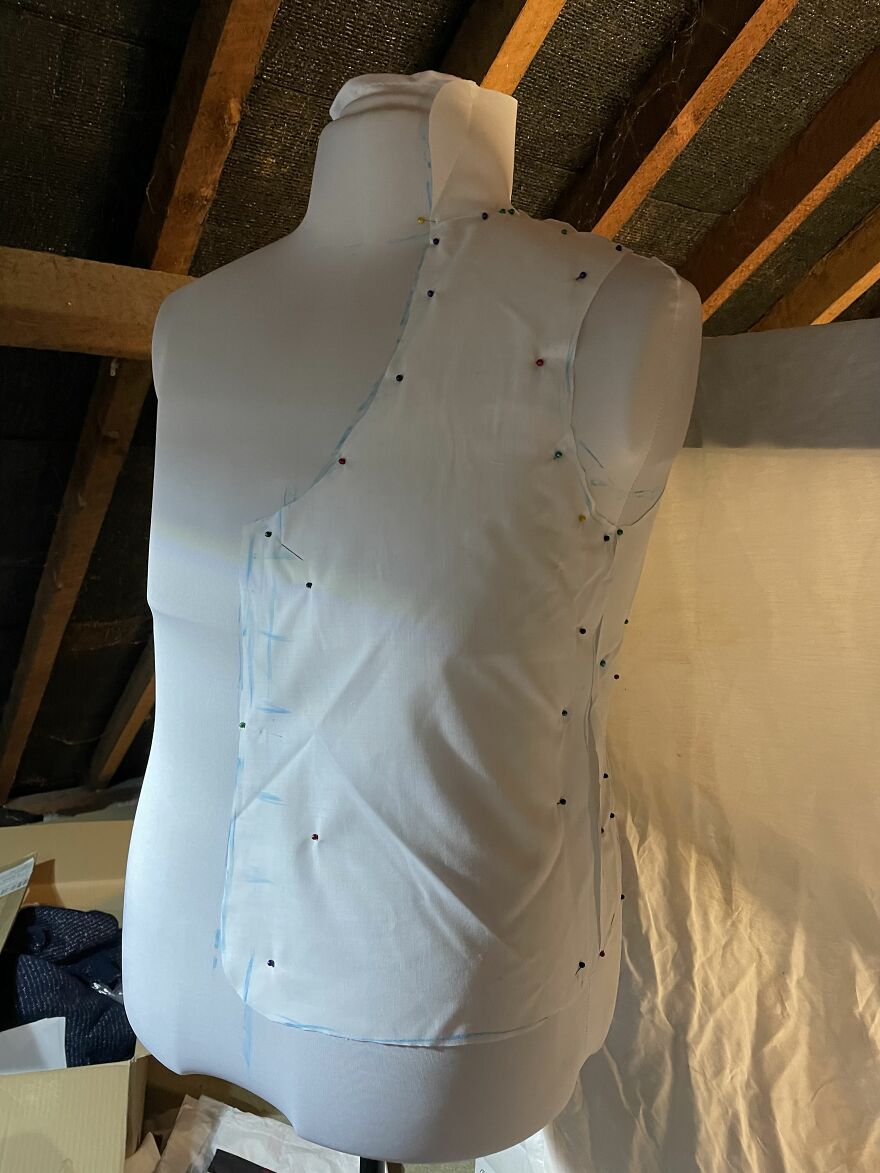
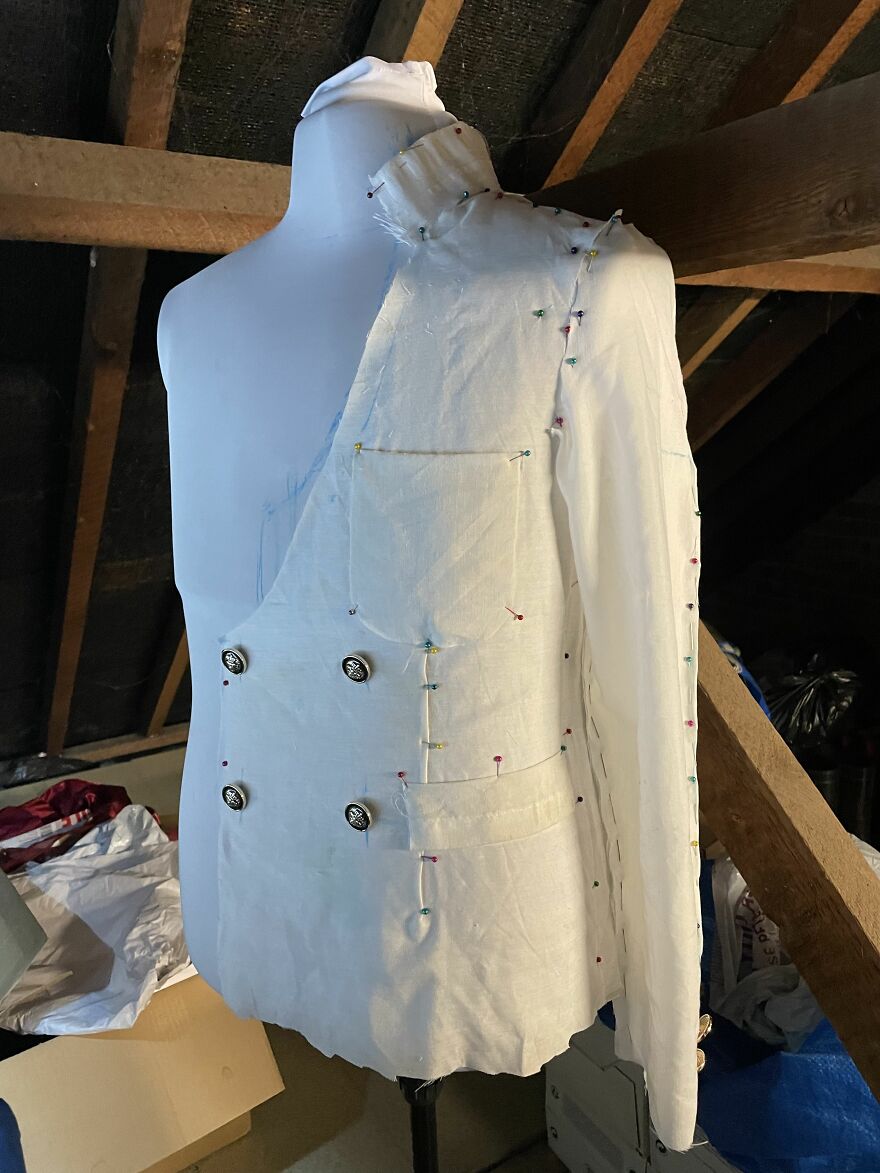
No wedding outfit is complete with a waistcoat. So naturally, I had to make one myself. I started, like with the cape, with a rough ‘toile’ made from cheap fabric in order to see if it all worked nicely.
Making sure that I can place the pattern onto the fabric symmetrically
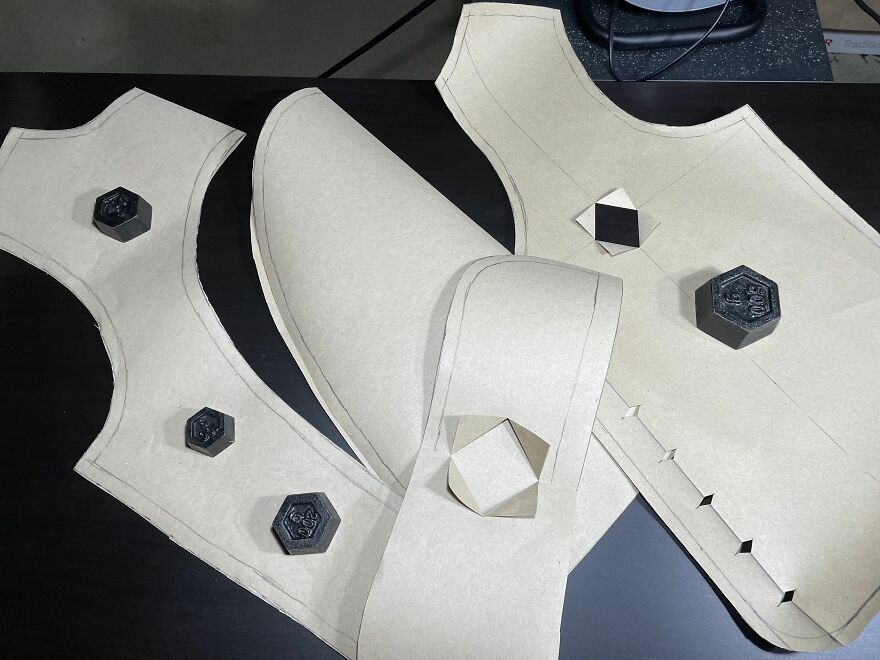
I then transferred the individual pieces onto sturdy paper and added seam allowance as well as some marker holes so I could place the pattern onto the fabric symmetrically.
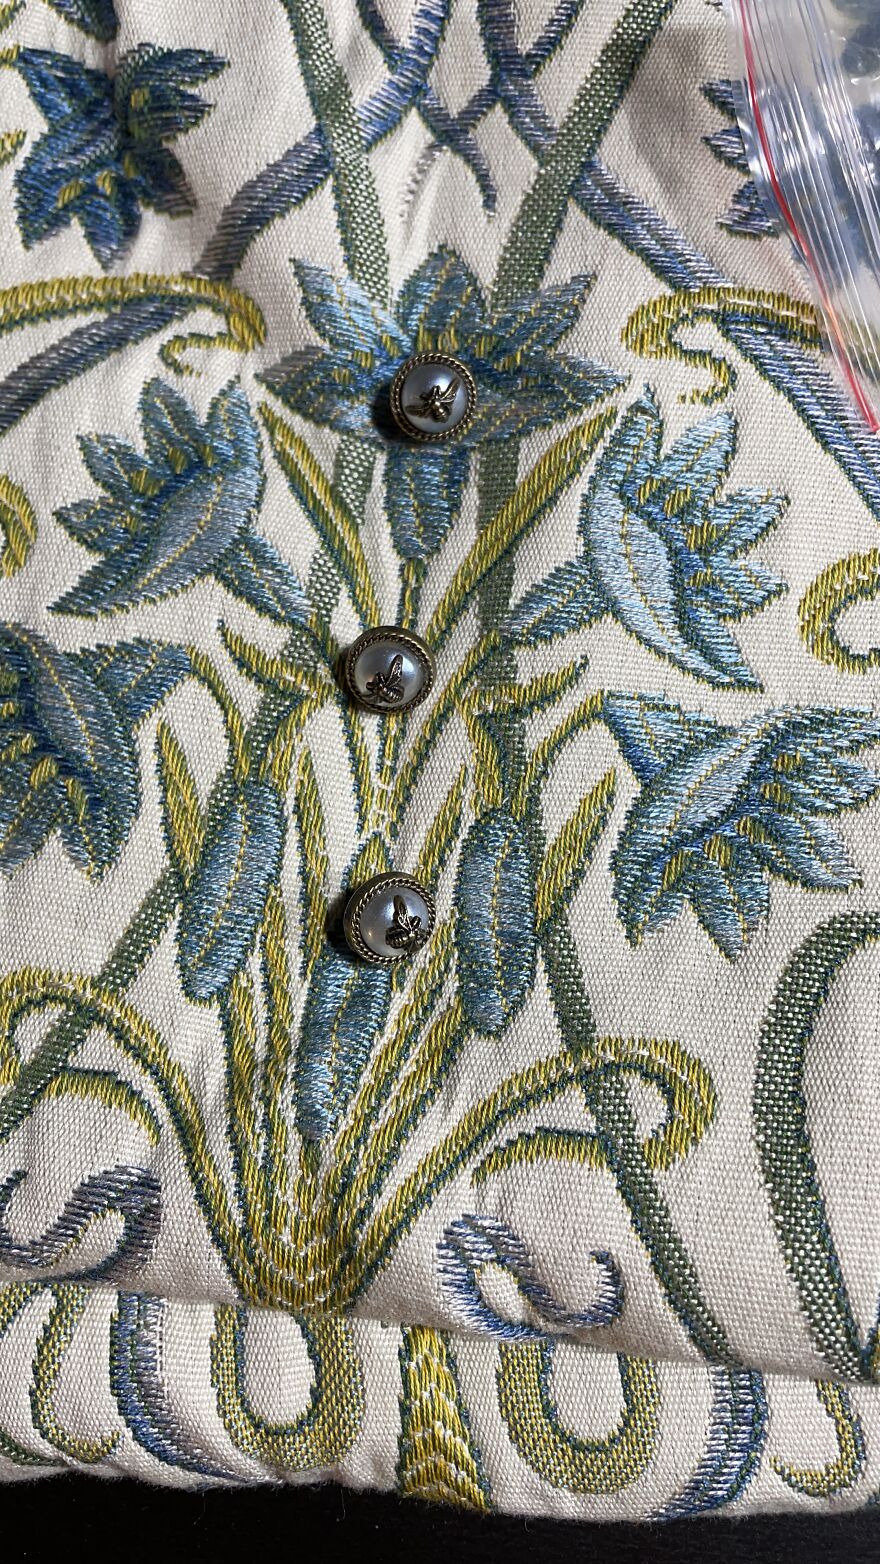
Added some gorgeous buttons that have a symbolic value
I got this gorgeous Phillip Morris Jacquard with Bluebells (for everlasting love). The buttons are pearls (purity) with tiny bees (hard work and endurance).
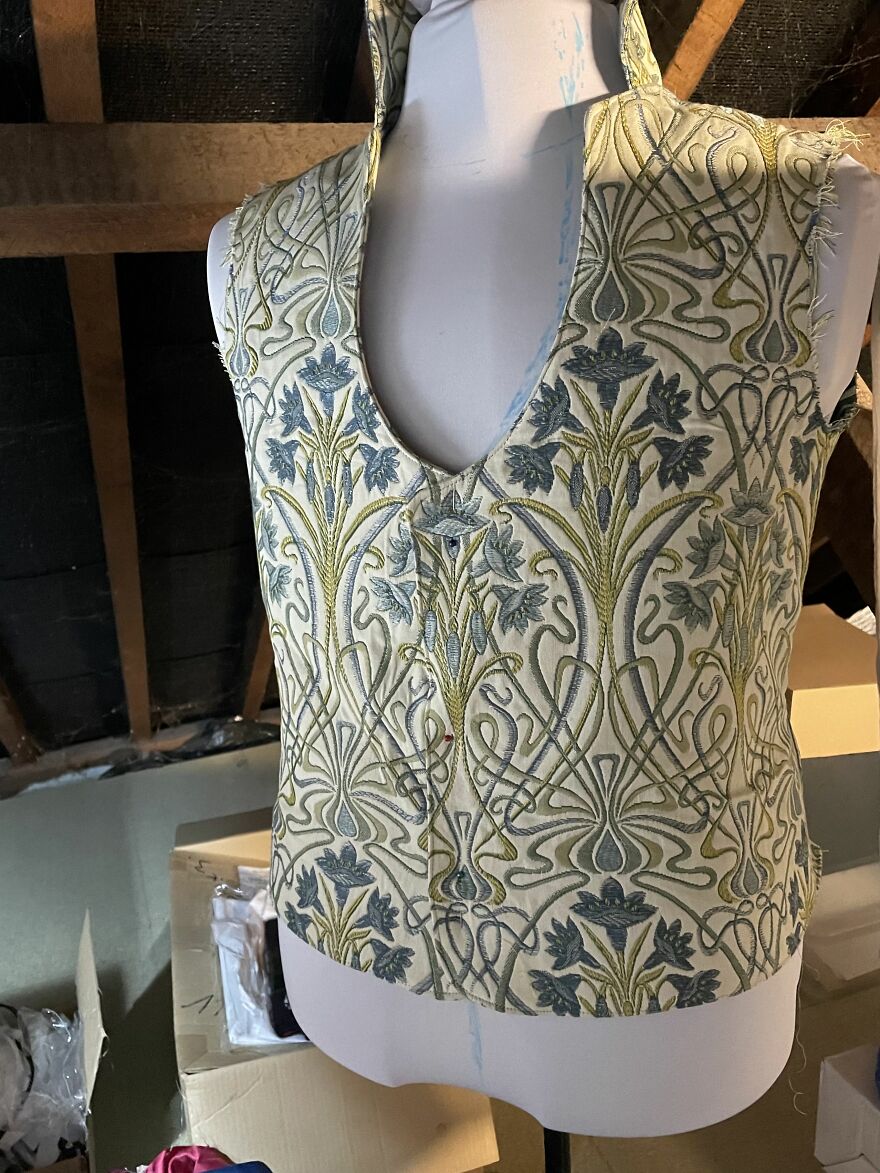
I wanted the fabric to match nicely
I put extra attention into the design of the fabric. I really wanted it to match up perfectly, so that it would be absolutely symmetrical.
Some finishing touches and the waist coat was done
I did not line the waist coat since I was worried it would be too warm. Because of that, I had to “seal” the seams inside with bias binding (a folded ribbon). Jacquard tends to “slip apart”—the fibres just unravel… It’s rather messy. So the bias keeps it all neat and fluff-free. I then stitched the seams down by hand inside with invisible stitches, so it would all lay nicely.
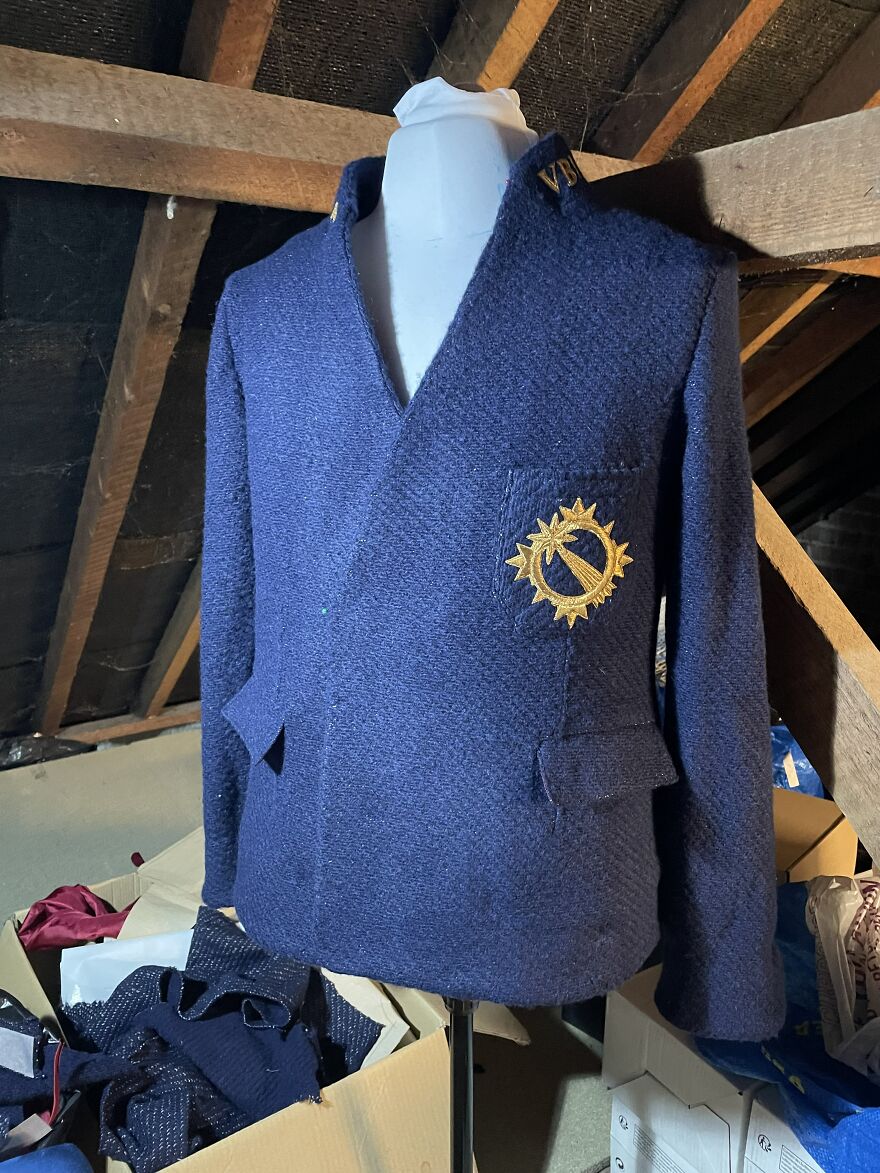
For the jacket I wanted a bit of a military vibe
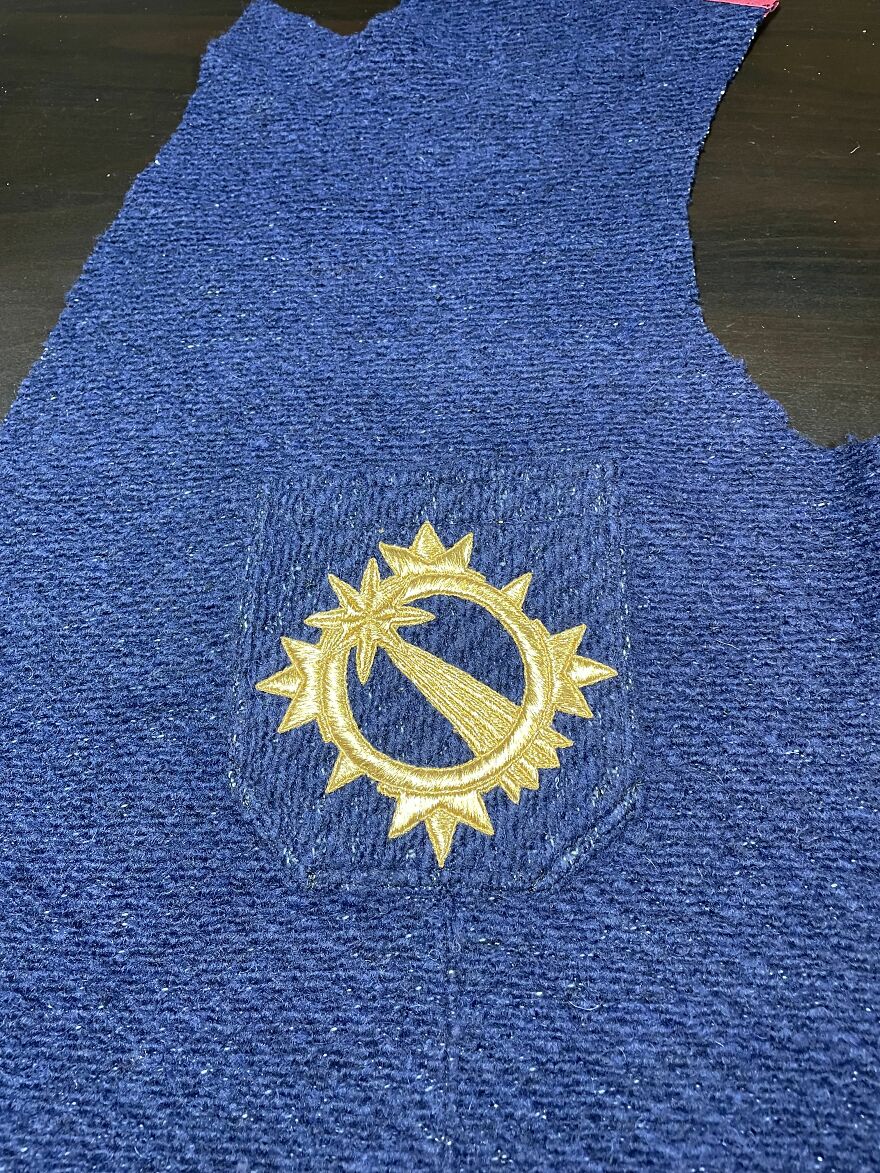
I wanted a bit of a military vibe while still keeping a contemporary look. I opted for a standing collar, breast pocket as well as side pockets with flap.
Coco Chanel inspired me to create the design of the arms
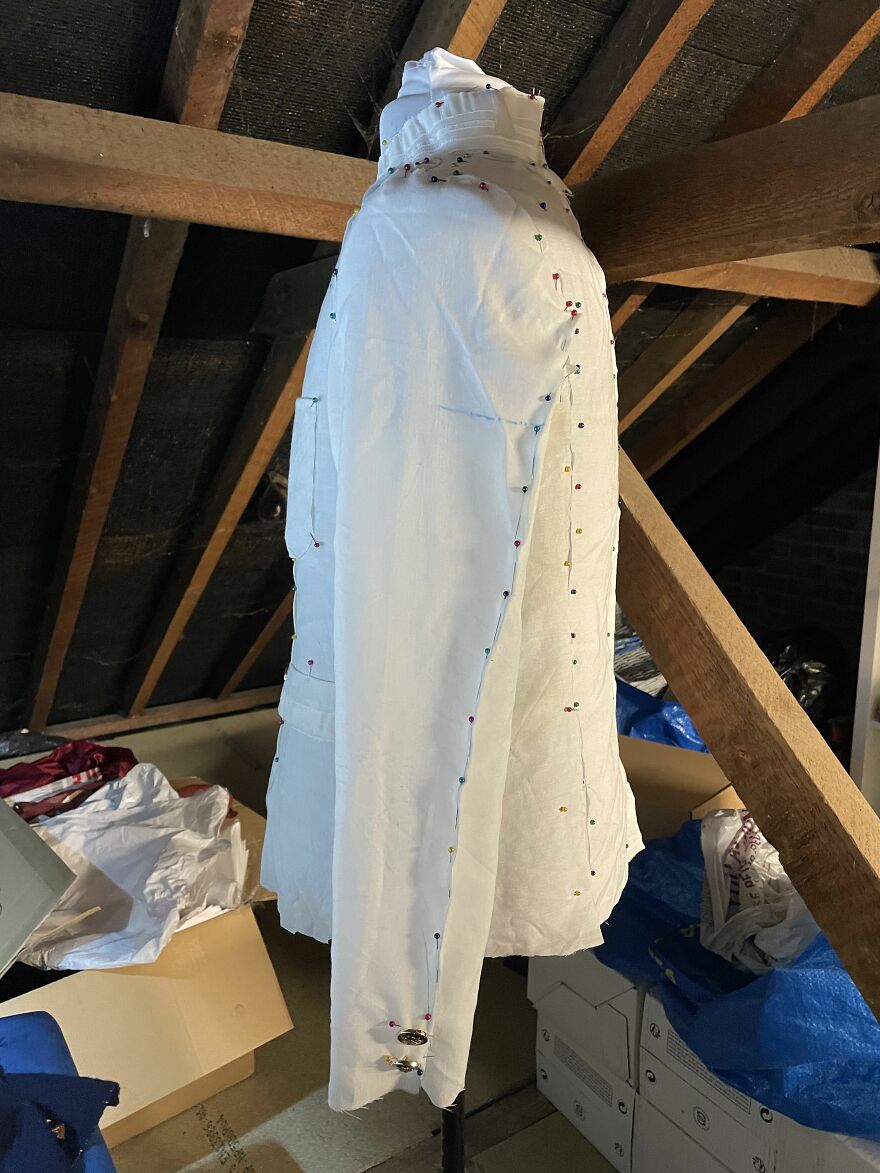
For the arms, I took inspiration from Coco Chanel and ‘twisted’ the side seam, so that the opening slit sits on the outside of the arm instead of the back. This will show off the beautiful buttons on it more nicely.
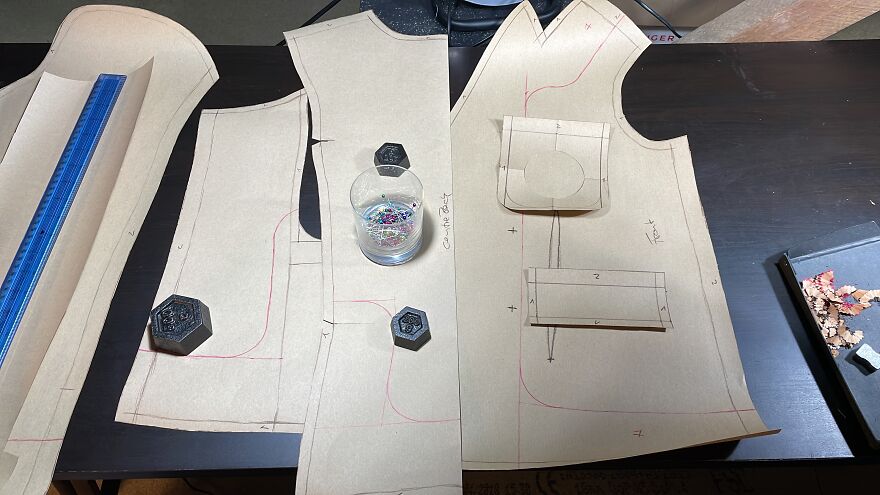
After the look of the jacket was complete I could transfer the pattern onto paper
Now that I was happy with the look of the jackets, I could transfer the pattern onto paper and add seam allowance. You can see red markings on there. Those are for the pieces that would go inside the jacket. I did not want to put lining into the jacket because it would be too warm otherwise. Because of that, I needed to add big pieces onto the seams to get a neat finish.
The most scary part—cutting the fabric
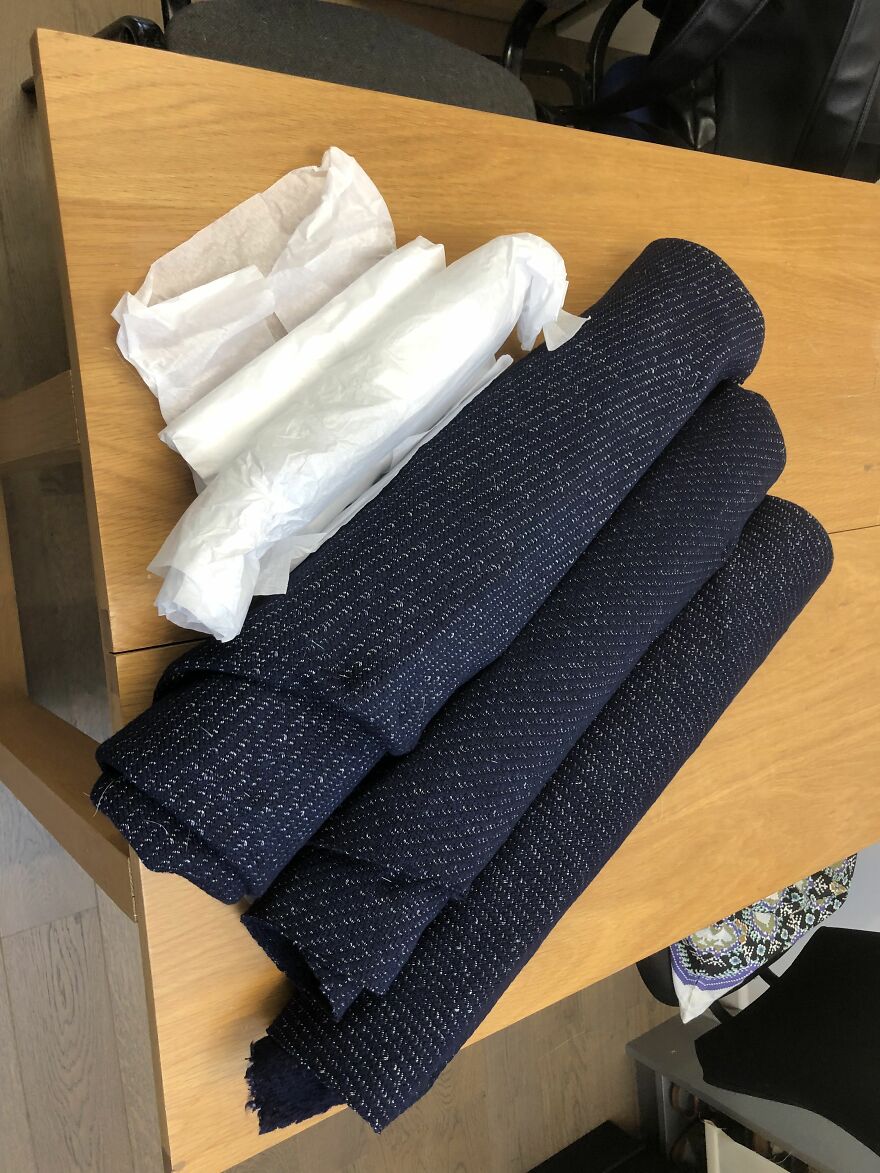
Cutting the first time into the fabric is rather nerve-wracking for me. I am always worried that I’ll mess it up and then the whole fabric is ruined. The fabric that I chose for the jacket is the same that I used for my cape. It is navy blue wool boucle, a rather ‘breathy’ fabric with a lot of texture. Also a nod to my favourite designer Coco Chanel.
The jacked turned out perfectly
The jacket looked exactly like I envisioned it! I steamed and ironed it so everything was neat and crisp. All that was left now was to add the buttons.
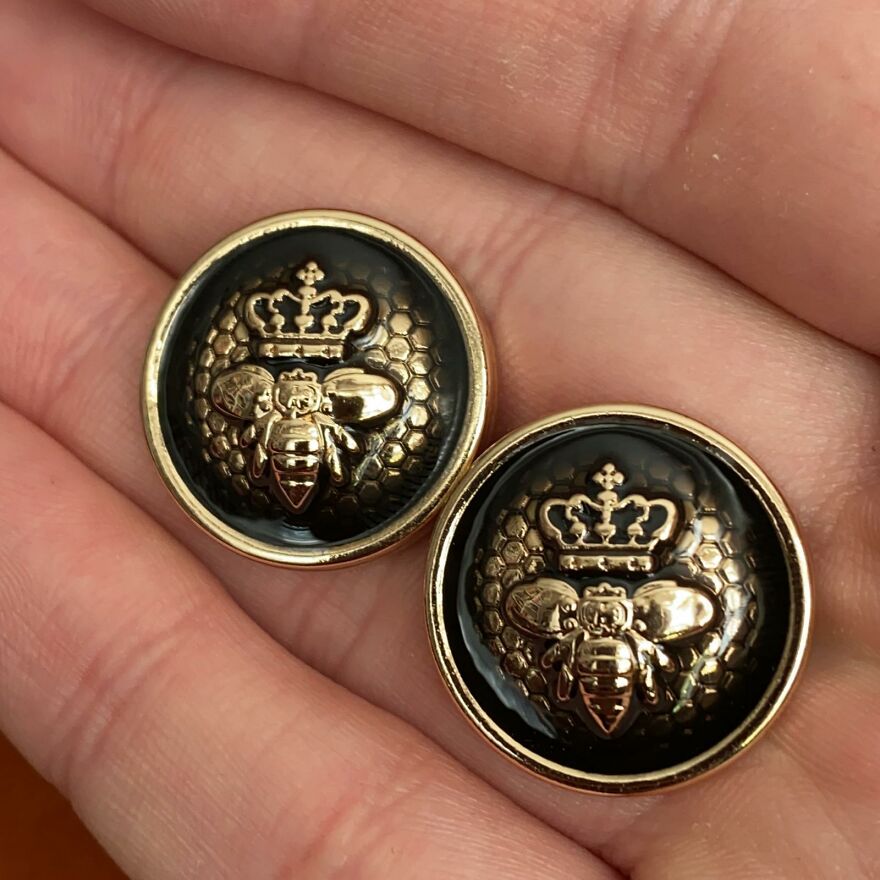
I found amazing buttons to add to my jacket
I found these stunning Queen Bee buttons. They are perfect for the jacket!
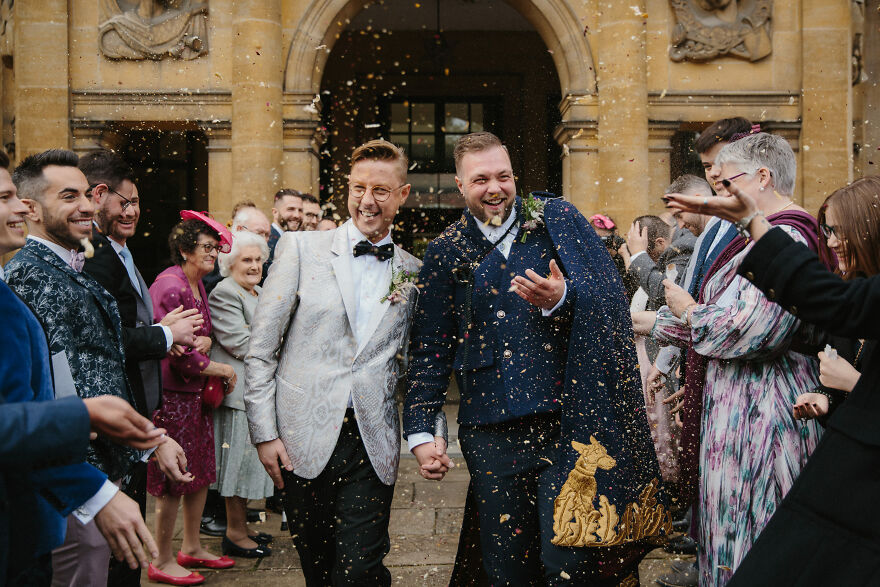
Finally we got married in a perfectly stunning venue
After 18 months’ delay, we finally got married! My partner found our perfect venue. We got married at Eltham Palace in London. This medieval palace fell into disrepair. In the 1930s, a rich industrial couple bought it and renovated it very much in the style of the day. Everything Art Deco! absolutely stunning!
So nervous—so happy!
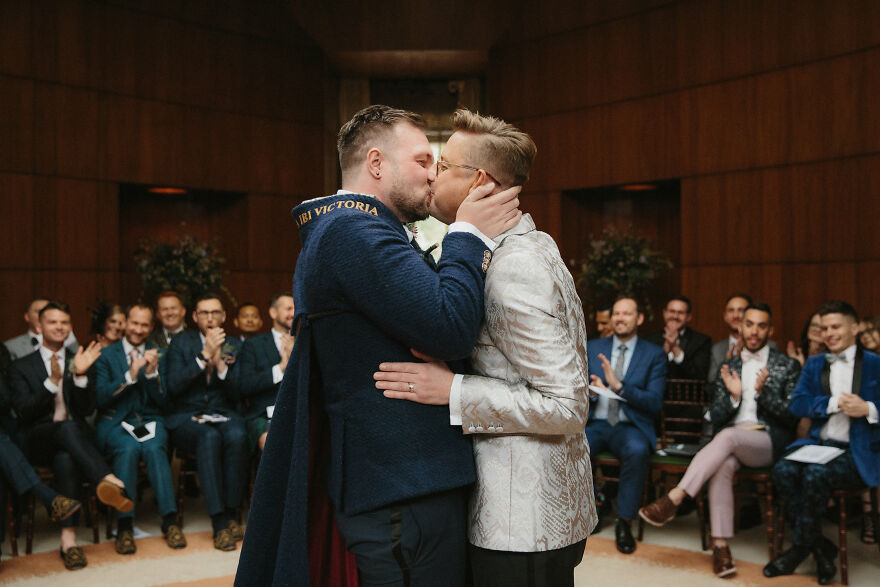
We finally were allowed to say “yes”
Surrounded by all our friends, we finally were allowed to say ‘I Do’. It is the happiest day of our life!
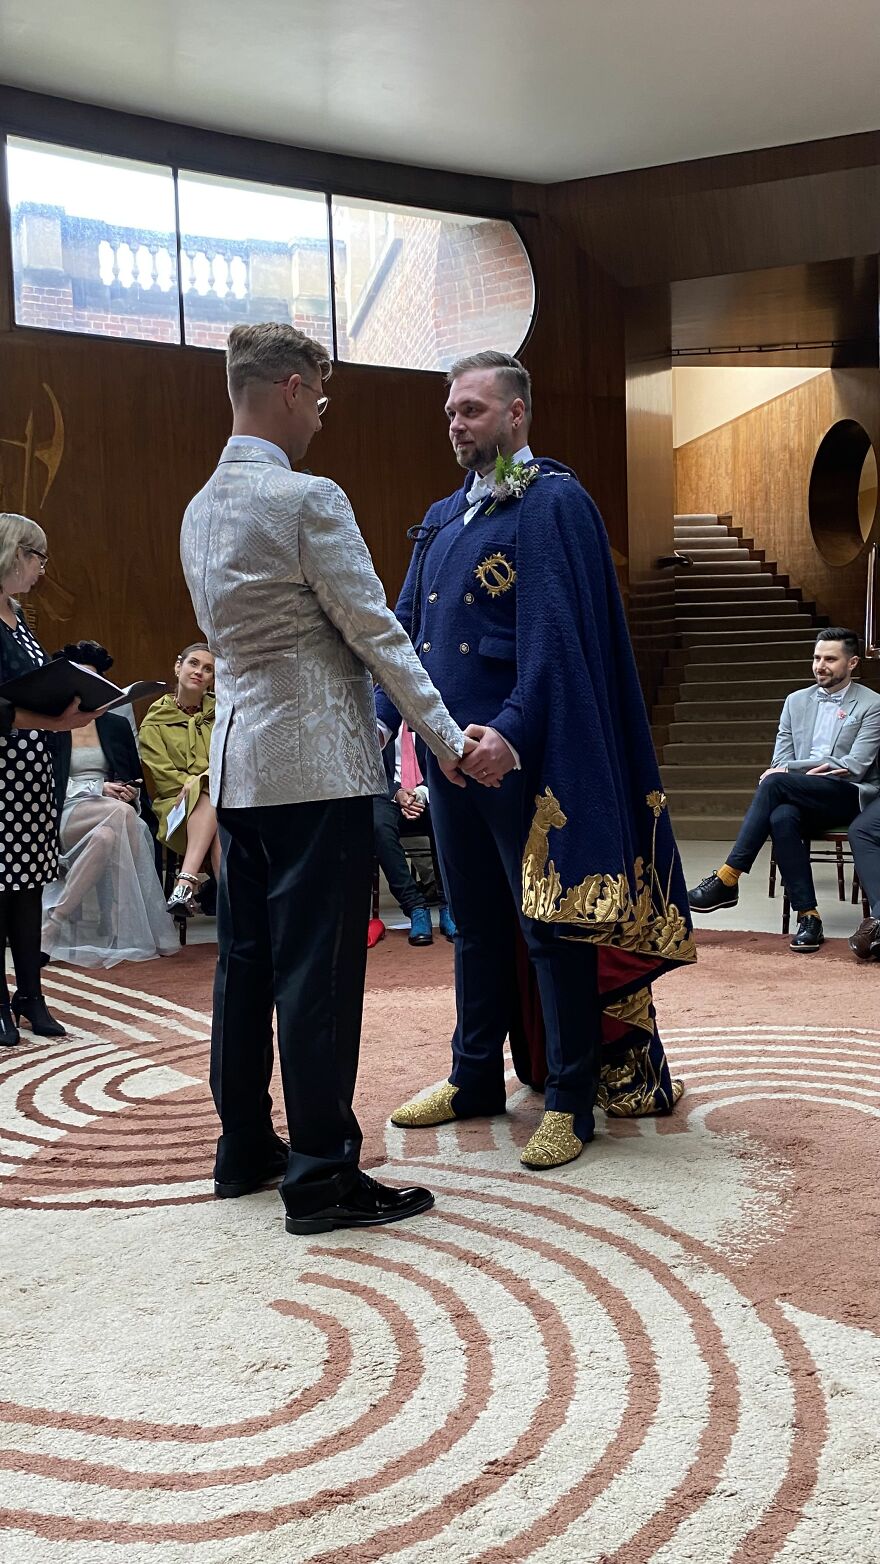
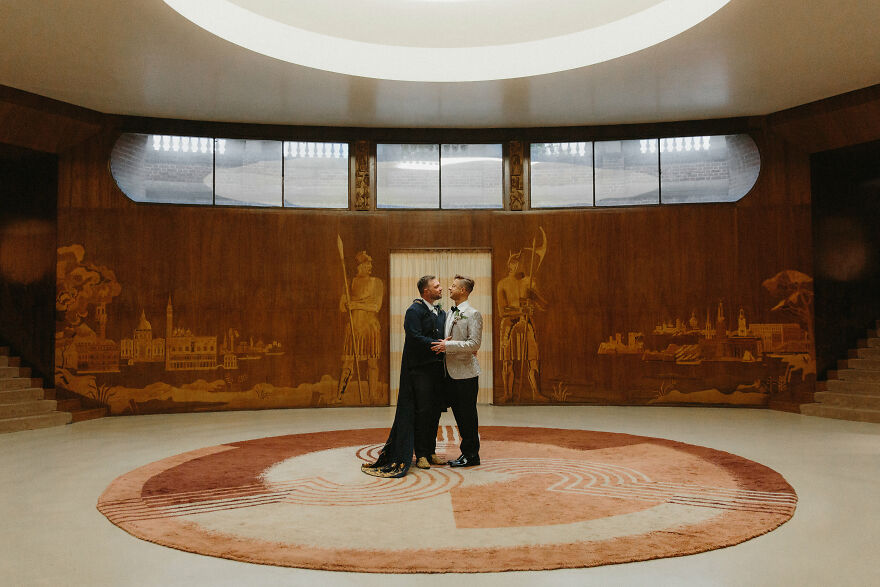
First time alone as Mr. & Mr. standing in this beautiful venue
This room is so beautiful! We fell in love with it the first time we saw it. We knew then that we would get married in the exact centre of it surrounded by our friends and family.
13Kviews
Share on FacebookExplore more of these tags
This is just so sweet. Your insane skills and your genuine love... may the both of you live a happy life together :)
I am just so impressed by the work you did, the techniques you used and the thought that went into it all. I am also insanely jealous as I would love to have these skills. Congrats and best of luck to you and your partner.....and the Watcher too!!
Wow! That's beautiful. All of it. The outfit. The marriage. The story. Thanks for sharing!

 Dark Mode

 No fees, cancel anytime
















132
127