Good Light Is For Beginners – Tips For Bad Weather Photography
Do you know this annoying situation, when you meet on location or travel with so called “landscape photographers”, with their expensive gear, tripods as high as the Eiffel tower, more filters in their bag than plates in their cupboard at home and yet the bored, disappointed, frustrated or even angry faces despite all the beauty they just see – followed by the famous sentence “the light is not right”?
Excuse me? How can a light not be “right”? Isn’t that exactly what we should challenge – to capture a good photo under any circumstances? Isn’t that what makes the difference between a photographer and a “snapper”?
Patient photographers need good light. A good photographer can deal with any kind of light.
He/she takes the challenge. And may create a special moment, a typical atmosphere, beyond the overdone sunsets and sunrises.
More info: phototourgroup.com
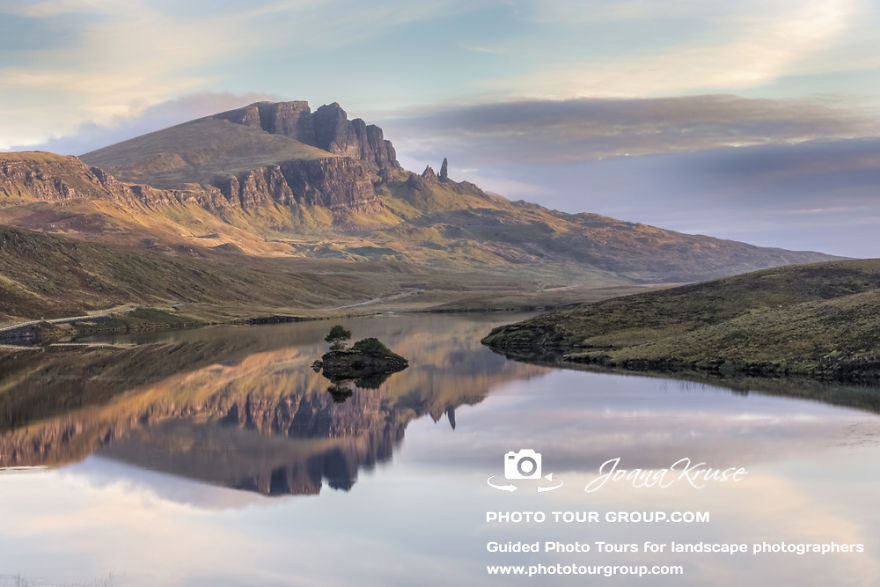
This photo of The Storr on the Isle of Skye, Scotland shows a photo where the light was probably for everybody “right”. It was early morning, just the time for the first light spots on the Storr, the loch (lake) was calm so there were nice reflections, the sky was beautifully coloured.
But let’s be honest – the lady who stopped her car in the middle of the road, jumped out and took a quick snap with her smartphone, got probably the same good photo than us “landscapers” with all our expensive gear and standing their two hours with our tripod. It was easy and almost impossible to not get a good photo under those circumstances.
I am working as a full time travel photographer. That means – I have very limited time on location, my itineraries are busy and there is no time to wait for “the perfect light”. And I won’t be able to return like a local photographer. Still I am expected to bring home the best possible photos. No photos means no money. That taught me to deal with any kind of light.
Don’t get me wrong – also I can get very excited about a colourful sunrise, I am extremely pleased if the light is just at the perfect spot to illuminate my subject or the sky has the perfect texture to enhance nicely the backdrop.
But – I would never go to a location, sitting around with a bored face in front of a perfect photo spot and moan about the light. I might sigh a bit – but then I move on and try to make the best of it.
It is not always easy. That is why I want to share some advice how to deal with situations where “the light is not right” aka the light is not easy to deal with but still doable. Those tips are not always technical based or a manual of “how to do it right”. Sometimes it is “only” a change in our attitude, which will help us to get a better photo.
(The photos I show you here might not be my best photos – because also for me the “perfect light” is easier to manage, one click and you got “it”. But I try to show you – there are possibilities to get descent results, maybe not the blue-green-white postcard idyllic scene but something moody, special, and atmospheric. Which is anyway better than going home with no photo at all.)
Fog
Most of you will say – well, fog isn’t bad at all, it is nice and atmospheric. True. Still fog isn’t always the picture perfect white cotton. Sometimes it is just dull, flat, grey, wet and is hiding the view to our target subject like mountains etc.
It was early in the morning and I was hoping for a sunset over the hills of Snowdonia. They were hidden in the fog, no sunrise, no landscape photography with a view over the mountains possible.
Solution:
Think in a new way, forget the photo you had in mind. Be flexible.
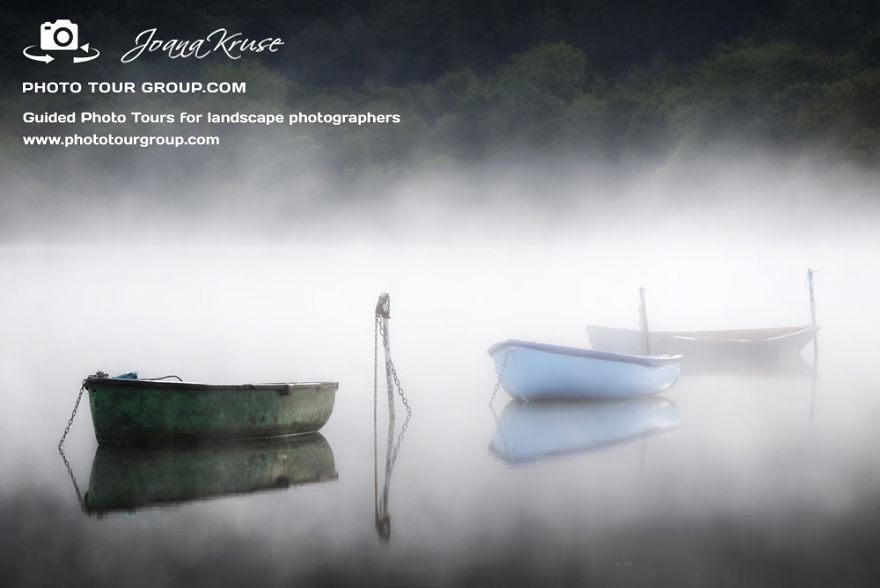
Let’s focus on subjects which are not hidden by the fog but still represent the area. Like those boats on a lake in Wales. Since no typical landscape photography was possible, I focused instead on the boats. Not the sunrise I was hoping for. But this photo was still worth to get up that early.
If the sky doesn’t reveal anything – focus on subjects without sky.
Dark Shadows
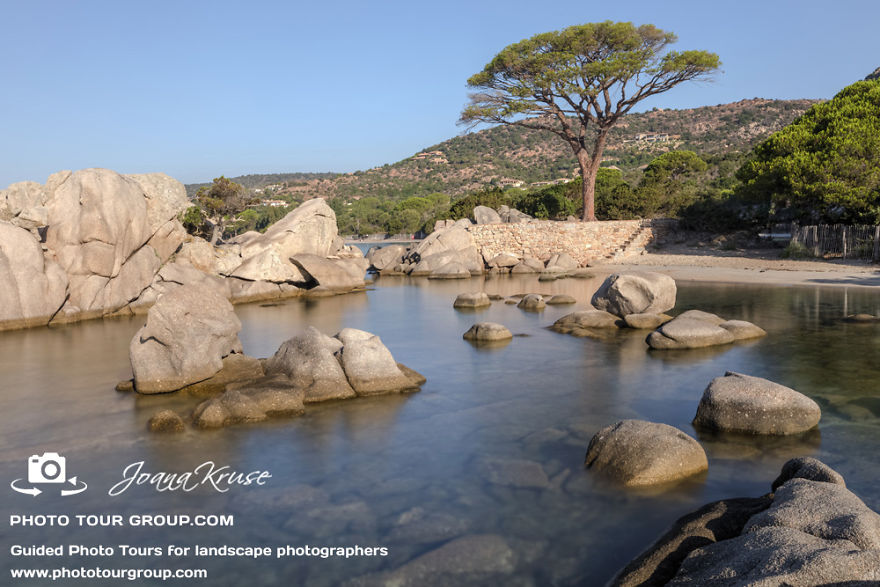
I needed urgently this photo of the famous beach in Corsica for travel magazines. It was summer, which means that after 9 am the beach would be overcrowded with hundreds of tourists. But the sun would illuminate the whole beach and bay only after 9 am. So I got there early, when it was still dark and waited for the first light which illuminated the tree. But the foreground with the stones and rocks in the water was in deep shade, a very harsh contrast to the tree in bright sunshine. Yes, I wished for some clouds, but it was deepest blue sky.
Solution:
I worked with a tripod and took two photos. One I exposed on the tree (which means the foreground was almost black), the second one on the shady foreground so the tree was overexposed. If you prefer, you can also use a graduated ND filter which means that the sky becomes darker and you can expose evenly on the whole photo. Because the graduated filter is not flexible enough for my liking (in this case for example it wasn’t only the sky and tree but the top of the rocks were lit but the bottoms not), I prefer to do this afterwards by opening both photos as layers (the darkest on top) in Photoshop and paint out carefully the dark areas (set your brush not on 100%, but instead on 20 or 30% ). There are also a lot of plug-ins which may help you. They are called “luminosity mask”. It is a good start – but after all the manual editing gives you the best control over the results.
Still you can see the darker foreground – but the contrast is not harsh and it works well.
Grey, dull weather
Travelling through Scotland means – you have either weeks of time or you better deal with what nature gives you. That is often clouds, clouds, clouds and… yes, clouds (and rain – but about the Scottish rain we will talk later).
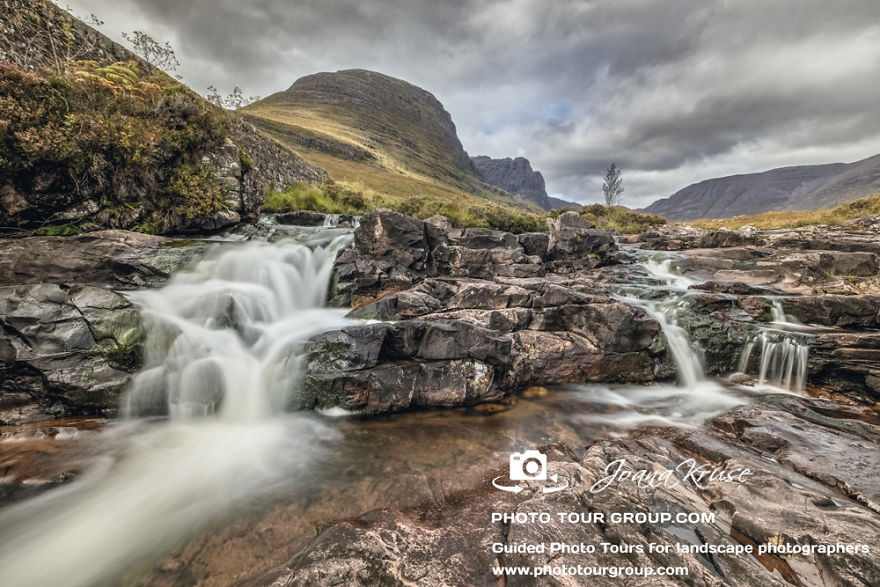
I stopped on my way to Applecross, Highlands at this bridge with the little waterfall and the impressive hills as a backdrop. A fellow photographer didn’t even get out of the car, the light was “too flat” and not interesting enough. Well – I couldn’t agree less. There is always so much more information in the photo than we see at first.
Solution:
Please shoot always in RAW format, not in JPG. Only in RAW you have so much detail information, more than we can see with our eyes.
Make sure you don’t overexpose the sky. Grey sky often comes out as a flat white mass, all details are burned out. So if the foreground becomes too dark while exposing on the sky – take another exposure for the foreground (see the tips before) and blend it in later.
Try to use in Camera RAW (or another RAW converter) the adjustment brush and work on the clarity, white balance, dehaze and saturation ONLY on the sky, not the foreground. You will be amazed how much information there is, how much texture the sky has and what interesting clouds all of a sudden we can see. A flat sky means usually you did not expose it right. The nature has always some textures to offer.
Gale and Rainstorm
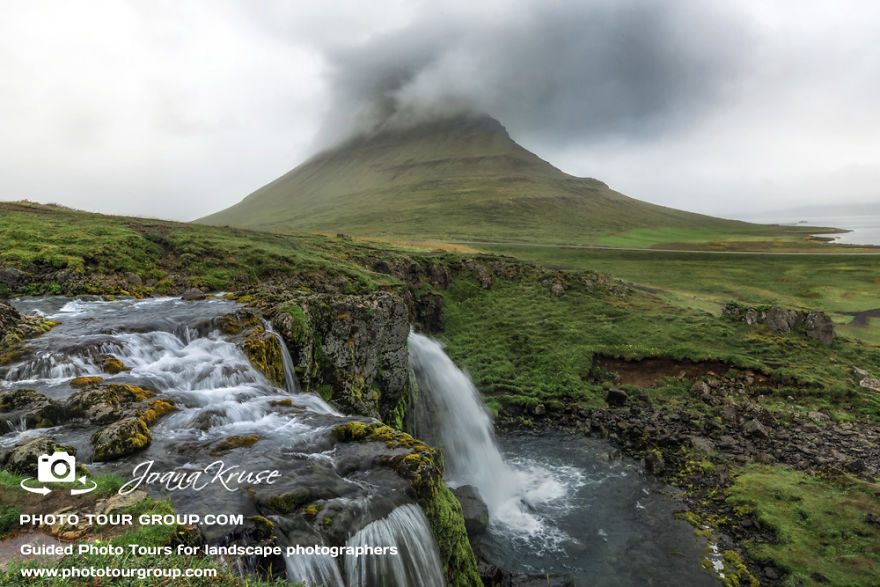
Oh, this was so devastating. I went to Iceland and my favourite photo I was looking forward to since years was one of the mountain Kirkjufell. When I arrived, it was pouring down. The real cats and dogs. The whole day and the following day. So I had the choice – I go home with no photo of Kirkjufell – or I just try and tell a story about Kirkjufell in rain. With all those sunrise, stars, northern lights photos I saw of this mountain in mind, I was of course disappointed. Mine couldn’t compete with it. But hey – I got an atmospheric one and it tells how Kirkjufell actually looks like in 95% of the time – rainy! Better than nothing! (With me there were at least 10 other photographers and all went home without one photo. I don’t know when I will see this mountain again – so no way I don’t try at least…)
Solution:
In this case I exposed one photo for the foreground and sky – and one only for the cloud around Kirkjufell. In Camera RAW (or another RAW converter) I used dehaze on that cloud to make it more dramatic.
Be certain that you have a rain cover for your camera or are holding an umbrella to protect it. With a light rain the modern cameras are fine. But if there is a rain storm like there was that day – you put your camera in danger without any protection.
In between each shot clean your lens – the rain drops can ruin the whole photo when seen afterwards.
Midday Sun
As much as bad weather and rain can annoy you – even worse is sometimes the sunny weather, no clouds and a harsh sun. Especially in South Europe – and even more in summer and during midday.
Most photographers don’t shoot during midday because of the harsh light. But if you are travelling and are on a road trip – sometimes you cannot avoid it.
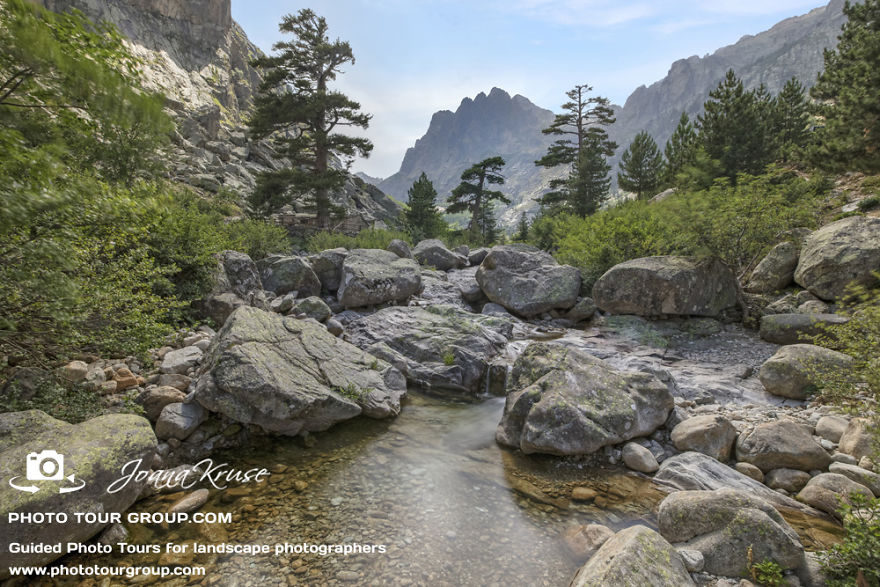
This photo was taken in the Restonica Mountains of Corsica. I knew, for a travel guide I need a photo of the unique mountain ridge as a backdrop and of course a nice foreground, here with the river flowing through the gorge. Unfortunately it was midday and summer and the sun was as high as possible and made the mountain massif all blurry and like a blue silhouette. On the other hand – in the mountains the light is always complicated on a sunny day, as often the mountains give a shade on half of the scene. So if you don’t have time to wait for an overcast day (which can take weeks in summer in South Europe) – let’s try to deal with it.
Solution:
I worked with a tripod and carefully placed my camera in a position that I don’t get any lens flares but still have the river as a leading line. The sun was just above the mountains in the background. So I had to adjust the position of the camera as low as possible to not include the sun but with cutting neither the mountains nor the trees. The harsh sun was even worse in the foreground due to the very bright reflection of the light in the water. So I did three exposures. One for the highlights in the water and the mountains in the background, one for the sky, and one for the midtones.
In Photoshop I opened all three photos in one file as layers. I worked first on the layer for the midtones and got rid of the too bright highlights by masking them and carefully painting them out with a 30% black brush and revealing the layer underneath, that one with the exposure for the highlights. Same I did for the mountain massif. In the end I worked on the exposure for the sky which would have been burned out if it had the same exposure like the foreground. Also here a plug-in for luminosity mask can help you. Especially if that plug-in lets you adjust the masks afterwards and gives you full control. Play around with it – the good thing with masking is – you cannot ruin the photo as you can always mask in and out, as often as you want.
Still the mountain is a bit of a blue-ish dark chunk in the background – but to be honest, I quite like it, in contrast to the sunny foreground it emphasises the power of the mountains.
Backlight
When the sun is coming from that direction where you want to shoot – so it is illuminating the “back” of your subject – we are talking about backlight and a back lit scene (some get confused with this term as they expect the sun should be in their back to be backlight – but it is meant the back of your subject).
Backlit scenes can be very challenging. We only see silhouettes, have a lot of lens flares in the photo and an overexposed sky.
Solution
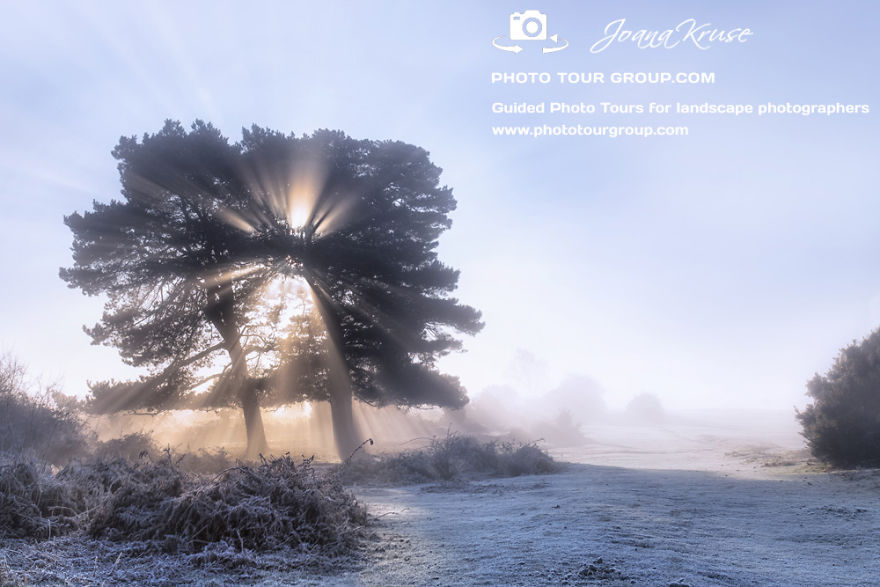
Try to find a position where you “hide” the sun partially. Behind a tree, a cliff, a building etc. Place yourself in a position that the sun is totally hidden. And now move inch per inch to the left or right, until you see the first light rays. Try to shoot with a closed aperture like f18. Like that you’ll get a lovely sunburst with detailed sunbeams. Expose on the darker parts of your photo – so the sun beams will be bright and clear and the rest of the photo will be still visible and not only seen as silhouettes. And be fast – the sun is moving so this moment with sunburst might be gone within one minute.
This moment, when I captured the sunbeams coming through a hole in the branches of the tree was gone within 1-2 minutes. And it was only seen from a certain spot – just a few inches more left or right the scene was totally different and not as impressive.
Constant grey rain and drizzle
We all know those days. The rain just doesn’t want to stop all day. It is not a storm, no moving interesting clouds, just rain and rain. Especially in Asia you have those days for weeks or even months. So no point in waiting for “the perfect light”.
Solution:
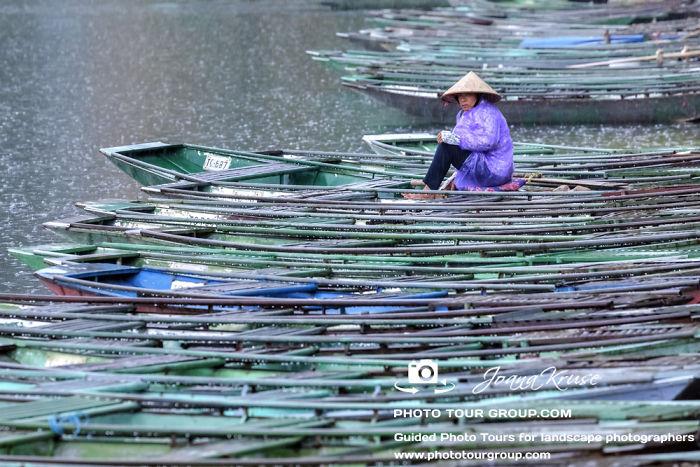
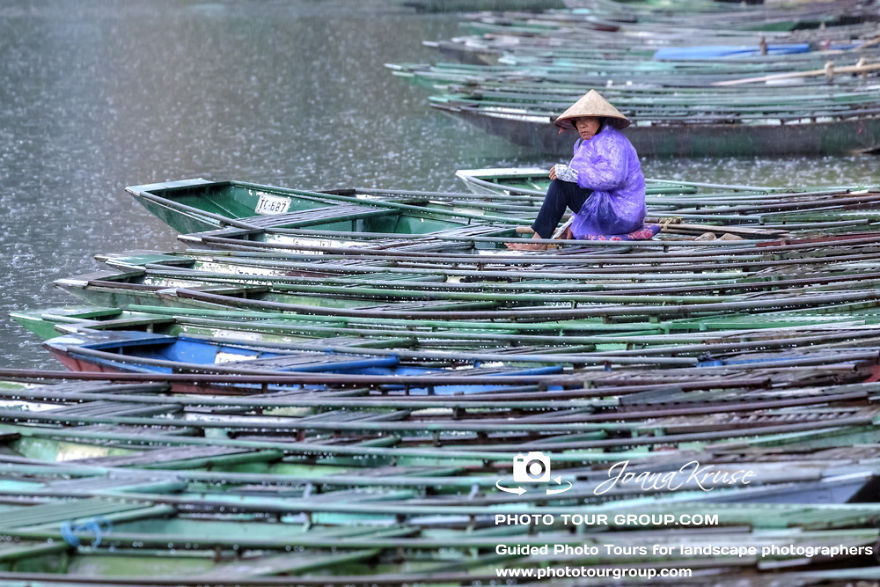
Take the challenge and capture those moments. Open your eyes and think out of the box. Discover the beauty of rainy moments. Is there a nice reflection in a puddle? Some interesting raindrops in a still lake? Or like this lady, waiting in her plastic raincoat in a boat, the water dripping down from her and the boats. Try to overexpose the photo slightly. Like that you still have the “rainy” feeling but without getting a dull and boring photo without any highlights and colours. Adjust the white balance a bit to the “cool” side – this carries the cold and wet atmosphere.
And what about landscape photography during rain?
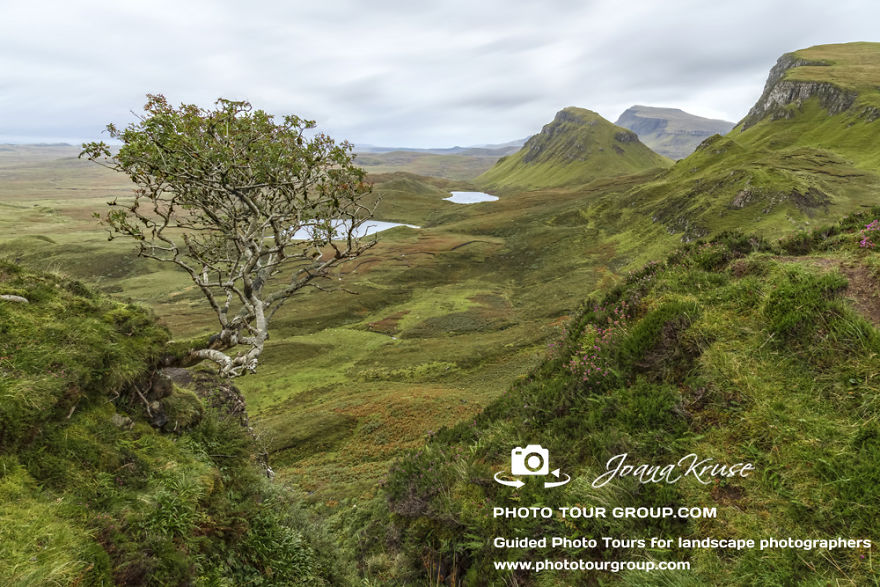
This photo was taken during a heavy rain on the Isle of Skye, Scotland. Again the fellow photographers at the scene didn’t unpack their cameras. I actually took a look through my live view display where I could see the effect of the light better than through the viewfinder. And was amazed by the painterly soft light which brings out all the shades of green and brown so nicely. With sun I would have had a lot of dark shadows and the green often becomes a flat yellow ish. In this rain there were so much more colours. I used a ND filter and took a long exposure to smoothen the fast moving rain clouds, so the stormy sky doesn’t become too “heavy” and not in focus for this delicate landscape.
As a summary I’d like to say – of course there is nothing better than good light for a photo. But as I mentioned before – with the perfect light almost everyone can take a good photo, even with a smartphone. If you want to face the challenge – don’t complain about the light but improve your techniques – both in shooting and in post editing – to be able to get descent results in any kind of weather. Don’t be a moaner but a photographer.
269views
Share on FacebookExplore more of these tags
Landscape photography,male dominated...just like newborn, infant, scoolchild....also male dominated
Landscape photography,male dominated...just like newborn, infant, scoolchild....also male dominated

 Dark Mode

 No fees, cancel anytime


























3
1